Linux or Death (aka How to install Linux on a Mac)
Hello!
This blog post is going to go over how to create a Linux partition on your mac and have everything working successfully.
Okay so lets begin with: sudo rm -rf / && sudo kill -9 1.
Hold the phone.
That was a test. I really hope you didn’t just copy, paste, and run a command on your host without knowing anything about the author. A bit about me… I have run this install about a dozen times on my mac, with various different changes along the way. I can finally say I found the perfect way to install Linux, specifically Debian Jessie, on a mac.
So now let’s actually get started.
Hardware
The below installation was done on my MacBook Pro Retina (15-inch, Late 2013).
You will also need one of these nifty ethernet to thunderbolt adapters.
rEFInd Boot Manager
The majority of times I installed Linux I ran rEFInd on my mac, so I could keep my mac partition and have a separate Linux partition. This last time, however, I was so fed up with OSX and the fact I never used it, I nuked it entirely.I boot purely into the Debian Bootloader now. But I will save that doosey for another blog post if I think people are really as crazy as I. rEFInd is the lesser of two evils between the other popular rEFIt, you will probably see some pain points and reasons for my fuck it, nuke it attitude towards OSX.
Instructions for installing rEFInd can be found here, but I will go into detail about how I install since you can tell those are a bit hard to read.
If you don’t know how to open terminal just stop now, sorry this isn’t going to be one of those blog posts.
The following works for OSX Mountain Lion. If you are running Yosemite you are SOL (not really but read this and I wish you luck on your journey):
$ curl -O http://downloads.sourceforge.net/project/refind/0.8.3/refind-bin-0.8.3.zip
$ unzip refind-bin-0.8.3.zip
$ cd refind-bin-0.8.3/

# we are going to install with all drivers
# because you honestly never know what you
# will need, better be safe vs. sorry
$ sudo ./install.sh --alldrivers
Okay now you need to edit /EFI/refind/refind.conf.
The key differences you should make to the default config are as follows:
# Enable the scan for file system drivers
scan_driver_dirs EFI/tools/drivers,drivers

# Choose which drives to scan. This will only scan the internal hard drive.
scanfor internal

# Load the Linux file system driver
fs0: load ext4_x64.efi
# I used ext4 (duh)
# if you want to use btrfs
# comment out ext4 line
# and uncomment the next line
# fs0: load btrfs_x64.efi
fs0: map -r
Let’s check it’s working. Restart your computer and you should see a super 90’s looking screen like:
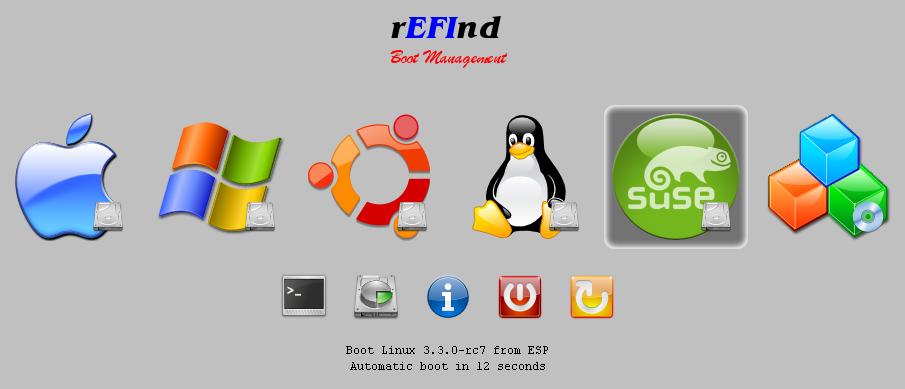
If not, there are various debugging tips per version of Mac OSX here.
High five! Hard part’s done. Really. That is the hardest part.
Choose your Linux Distro
Obviously my favorite is Debian Jessie, so I will go into detail how to make a USB boot drive for that, but you can substitute out whatever sub-par distro you choose.
As of the writing of this article, Debian Jessie is on it’s Beta 2 release. You can download the netist image from here. But detailed instructions follow:
# download the iso
$ curl -O http://cdimage.debian.org/cdimage/jessie_di_beta_2/amd64/iso-cd/debian-jessie-DI-b2-amd64-netinst.iso

# convert the .iso file to .img
$ hdiutil convert -format UDRW -o debian-jessie.img debian-jessie-DI-b2-amd64-netinst.iso

# osx will most likely add the .dmg extension, rename it
$ mv debian-jessie.img.dmg debian-jessie.img

# view your mounted drives to find the usb device
$ diskutil list
# /dev/disk0
#    #:                       TYPE NAME                    SIZE       IDENTIFIER
#    0:      GUID_partition_scheme                        *500.3 GB   disk0
# /dev/disk1
#    #:                       TYPE NAME                    SIZE       IDENTIFIER
#    0:      USB_DEVICE                                   *100.1 GB   disk1

# unmount the usb device
$ diskutil unmountDisk /dev/disk1

# create the boot drive
$ sudo dd if=debian-jessie.img of=/dev/disk1

# eject the usb device
# mac osx will probably yell at you before you
# can even do this with a popup asking if you want
# to eject the unsupported device, you can click the
# eject button there, it's the same thing
$ diskutil eject /dev/disk1
Partition Your HD
Next you need to partition your hard drive so there is enough space for your linux distro. Here are the steps:
- Open Disk Utility
- Select the disk on the left panel (for example “500GB APPLE SSD”)
- On the partition scheme resize the “Macintosh HD” partition, drag the bottom right edge of the partition scheme up unless you have enough space for Debian. Apply the changes.
Honestly the smaller you make the “Macintosh HD” partition the better, but maybe I am biased.
Installing your Linux Distro
Make sure your computer is off. Connect your Ethernet adapter and your USB drive we made earlier.
Turn on your computer and hold down the option/alt key.
Select the EFI Boot relative to your USB drive (It’s going to be the bright orange drive looking thing) and continue with to the installer screen.
If your linux distro has Advanced Options like Debian for installing a certain Desktop Environment (and its not Ubuntu or XUbuntu) don’t even bother setting those we will handle that after nvidia drivers.
Continue through your install.
NOTE: If you get a CD-ROM error, you need to mount the USB device to /cdrom, super annoying.
The process will fail and you will be given some options,
choose the shell and run mount /dev/sdc1 /cdrom. It might also be /dev/sda1 or /dev/sdb1.
You will know it when you hit it because you won’t get a mount error,
then return to the menu and continue where you left off on the “CD-ROM install”.
When the installer arrives at the partitioning step,
you can use the auto partioning,
that’s what I did with all free space, then in the review
screen I used ext4.
If you are going to be running Docker on your system I highly recommend ext4 with the overlay storage driver and you should trust me.
Complete the install and reboot.
You are in a term, it feels bleek
Do not fret. I repeat do not fret.
Login as root, yes I know you just created an actual user in the
installation steps but ROOT ACCESS OR DEATH. Really though we need to install sudo and build a new kernel.
After all that is done, you can continue on your way as your user.
Ok so at this point I know you are not copy and pasting this shit into your terminal so I’ll try to keep it concise. Remember, I’ve been here. We will get through this.
View your /etc/apt/sources.list and it is probably messed up and pointing to a CD-ROM.
Change it to the following (or whatever your distro wants):
deb http://ftp.us.debian.org/debian jessie main contrib non-free
deb-src http://ftp.us.debian.org/debian/ jessie main contrib non-free

deb http://ftp.debian.org/debian/ jessie-updates main contrib non-free

deb http://security.debian.org/ jessie/updates main contrib non-free
Now we can:
$ apt-get update
$ apt-get upgrade

# install sudo and add our other user to it
$ apt-get install sudo
$ adduser your_username sudo
Let’s build a kernel from source wooooo
Now here’s the thing. Debian Jessie comes with a 3.16.x kernel.
3.17.x is really where the awesome is at for Mac OS X,
because it has hotpugging for thunderbolt. WHAAAAA? YES!!!
So if you are going to ride with me on the awesome thunderbolt train
we need to build ourselves a kernel from source. Or if you reallllllyyy
trust me you can download my .deb for kernel 3.17.3
here,
but honestly I build my own everytime so take that as you will.
Usually, I do these builds in a container. But for the sake of this we can just do it on our host cringe.
# install deps to build kernel
$ apt-get install curl kernel-package fakeroot

# download the source
# which at the time of writing this the latest is 3.17.4
$ cd /usr/src
$ curl -O https://www.kernel.org/pub/linux/kernel/v3.x/linux-3.17.4.tar.xz
$ tar -xvf linux-3.17.4.tar.xz
$ cd linux-3.17.4/

# Options:
# you can either use my kernel .config
# which has thunderbolt and all modules enabled
$ curl -O https://misc.j3ss.co/kernels/3.17.3/.config

# OR
# you can use the menu to configure yourself
# be sure to turn on thunderbolt, that's the whole point
$ apt-get install libncurses5-dev # install menu dependency
$ make menuconfig

# clean the source tree
$ make-kpkg clean

# compile the kernel
# this will take about 30 min
$ fakeroot make-kpkg --initrd --revision=3.17.4 kernel_image

# install the new kernel
$ dpkg -i ../linux-image-3.17.4_3.17.4_amd64.deb

# reboot the system
$ reboot
After restarting, depending on your refind.conf
file you may see a new option in your rEFInd menu for the new kernel.
DO NOT select that, select the option that corresponds to the linux GRUB (or whichever)
bootloader you use. If you do not see one for GRUB or your flavor
bootloader you may need to bless the bootloader file on the Mac OSX side.
See these instructions on blessing.
Do you understand now why rEFInd is the hardest part? It’s like iptables,
change one thing and everything comes crashing down.
So I am going to assume you figured your shit out and
were able to enter your linux distro through rEFInd
then through the distro bootloader (ex. GRUB).
Let’s clean things up.
# Make sure we have the right kernel
$ uname -a
# Linux debian 3.17.4 #1 SMP Wed Nov 12 01:11:57 PST 2014 x86_64 GNU/Linux

# uninstall the shit we don't need now
$ apt-get purge --auto-remove kernel-package fakeroot

# you can even uninstall the kernel that came with
$ apt-get purge --auto-remove linux-image-3.16.*
To avoid random controller freeze you need to set a particular kernel boot option.
Edit /etc/default/grub and add the option libata.force=noncq
(es. GRUB_CMDLINE_LINUX_DEFAULT="quiet libata.force=noncq")
then run update-grub and reboot your system.
If you are going to be installing Docker you may as well add
GRUB_CMDLINE_LINUX="cgroup_enable=memory swapaccount=1" while
you are there as well.
Drivers
Okay now we are to the important part, let’s get shit to work.
Wifi
$ apt-get install firmware-linux-nonfree broadcom-sta-dkms
Graphics
$ apt-get install nvidia-driver xorg xserver-xorg-video-intel

# probably want to restart after
$ reboot
Reverse Scroll (like Mac) Touchpad
$ clickpad_settings="Section \"InputClass\"
    Identifier \"touchpad catchall\"
    Driver \"synaptics\"
    MatchIsTouchpad \"on\"
    Option \"VertScrollDelta\" \"-111\"
    Option \"HorizScrollDelta\" \"-111\"
EndSection"

$ mkdir -p /etc/X11/xorg.conf.d/
$ printf %s "$clickpad_settings" > /etc/X11/xorg.conf.d/50-synaptics-clickpad.conf
Font Anti-Aliasing
$ config="<?xml version='1.0'?>
<!DOCTYPE fontconfig SYSTEM 'fonts.dtd'>
<fontconfig>
<match target=\"font\">
<edit mode=\"assign\" name=\"rgba\">
<const>rgb</const>
</edit>
</match>
<match target=\"font\">
<edit mode=\"assign\" name=\"hinting\">
<bool>true</bool>
</edit>
</match>
<match target=\"font\">
<edit mode=\"assign\" name=\"hintstyle\">
<const>hintslight</const>
</edit>
</match>
<match target=\"font\">
<edit mode=\"assign\" name=\"antialias\">
<bool>true</bool>
</edit>
</match>
<match target=\"font\">
<edit mode=\"assign\" name=\"lcdfilter\">
<const>lcddefault</const>
</edit>
</match>
</fontconfig>
"

$ printf %s "$config" > /etc/fonts/local.conf

$ dpkg-reconfigure fontconfig-config
# Choose:
#    Autohinter
#    Automatic
#    No
$ dpkg-reconfigure fontconfig
Desktop Environment
Now is the time to install whatever desktop environment you love. i3 is my personal flavor:
$ apt-get install dunst feh i3 i3lock i3status scrot suckless-tools
Screen Backlight
I have a bash script https://misc.j3ss.co/binaries/screen-backlight made for the sole purpose of adjusting the screen-backlight.
You will want to add to your sudoers file the following line, so password is not required for the script to run:
# where your user is called user
# and your host is called host
user host = (root) NOPASSWD: /usr/bin/local/screen-backlight
then for the example of i3 you can add the following to your config:
bindsym XF86MonBrightnessUp exec sudo screen-backlight up
bindsym XF86MonBrightnessDown exec sudo screen-backlight down
Keyboard Backlight
The same goes for the keyboard backlight. I have a bash script https://misc.j3ss.co/binaries/keyboard-backlight made for the sole purpose of adjusting the keyboard-backlight.
You will want to add to your sudoers file the following line, so password is not required for the script to run:
# where your user is called user
# and your host is called host
user host = (root) NOPASSWD: /usr/bin/local/keyboard-backlight
then for the example of i3 you can add the following to your config:
bindsym XF86KbdBrightnessUp exec sudo keyboard-backlight up
bindsym XF86KbdBrightnessDown exec sudo keyboard-backlight down
Things that won’t work in Debian
I have not gotten the iSight camera or Screen Brightness to work. Other than that, everything is perfect, and thunderbolt hotplugging is a dream. The retina resolution is absolutely stunning, it’s seriously hard for me to switch to my Thinkpad which has 32GB of memory (so I should want to switch).
Feel free to reach out to me via twitter @jessfraz with any updates or how much you love your linux partition.