A Tale of Two 3D Printers (and all additive manufacturing processes)
I have wanted a 3D printer for a very long time. I hope you can tell from my ACM Queue column that I like to do a lot of research and I tend to want the best thing. I had been keeping my eyes on the 3D printer product space for quite some time. This article is going to go over the technical details behind 3D printing as well as my experience with two different products. When I finally decided to buy a 3D printer, I wanted to try ones that used different additive manufacturing processes: material extrusion via fused deposition modeling (FDM) and vat polymerization via stereolithography (SLA)1. While I would have loved to have gotten a printer for each of the seven different additive manufacturing processes, I did not. However, I did dig into the details of all the various additive manufacturing processes and technologies. Let’s dive in!
If you would prefer to skip the research you can jump down to the review.
Additive Manufacturing Processes
Popular culture uses the term “3D printing” as a synonym for additive manufacturing processes. In 2010, the American Society for Testing and Materials (ASTM) group “ASTM F42 – Additive Manufacturing”, formulated a set of standards that classify the range of additive manufacturing processes into seven categories2. The processes vary on the material and machine technology used which has effects on the use cases and applications as well as the economics.
Material extrusion
Material extrusion defines a process where an object is built by melting and extruding a thermoplastic polymer filament in a predetermined path layer by layer. Imagine if you were building an object and the only material you could use is a tube of toothpaste. You’d slowly build the walls of the object by putting layers of toothpaste on top of each other. Material extrusion is similar.
Material extrusion devices are the most commonly available and the cheapest types of 3D printing technology in the world. It represents the largest installed base of 3D printers globally. The most common applications are electrical housings, form and fit testings, jigs and fixtures, and investment casting patterns. The technology used for the material extrusion process is known as fused deposition modeling or FDM3.
Fused deposition modeling (FDM)
FDM, also known as fused filament fabrication (FFF), works with a range of standard thermoplastic filaments, such as acrylonitrile butadiene styrene (ABS), polylactic acid (PLA), polyethylene terephthalate (PET), thermoplastic polyurethane (TPU), nylon, and their various blends.
Let’s break down the FDM process in steps:
- First, a spool of thermoplastic filament is loaded into the printer. Once the
nozzle has heated to the correct temperature, the filament is fed to the
extrusion head and in the nozzle where it melts.
- Second, the extrusion head is
connected to a 3-axis system that allows it to move in the X, Y, and
Z dimensions. The melted material is extruded in thin strands and is deposited
layer by layer in predetermined locations, where it cools and solidifies. The
cooling process can be accelerated by using cooling fans attached to the
extrusion head, if the device supports it.
- Third, filling an area requires multiple passes, similar to coloring with a marker or drawing with toothpaste. When a layer is complete, the build platform moves down or the extrusion head moves up, depending on the device, and a new layer is deposited. This process is repeated until the object is complete.
Because of this process, FDM objects tend to have visible layer lines, unless smoothed, and might show inaccuracies around complex features.
Vat photopolymerization
Photopolymerization occurs when a photopolymer resin is exposed to the light of a specific wavelength and undergoes a chemical reaction to become solid. This is a common approach additive technologies use to build an object one layer at a time.
Vat polymerization processes are excellent at producing objects with fine details and give a smooth surface finish. This makes them ideal for jewelry, low-run injection molding, dental applications, and medical applications, such as hearing aids. The main limitation of vat polymerization is the brittleness of the produced objects. For this reason it is not suitable for mechanical parts4.
Stereolithography (SLA)
Stereolithography was one of the world’s first 3D printing technology, invented by Charles Hull in 19845. SLA resin 3D printers use a laser to cure liquid resin into hardened plastic.
Let’s break down the SLA process in steps:
- First, a liquid photopolymer is filled in a vat or tank.
- Second, a concentrated beam of ultraviolet light or a laser is focused onto the surface of the vat or tank. The beam or laser creates each layer of the desired 3D object using cross-linking or degrading the polymer at a specific location. This step is repeated layer by layer, a 3D physical object is built until completion.
SLA objects have high resolution and accuracy, clear details, and smooth surface finishes. SLA is also quite versatile for many different use cases since photopolymer resin formulations with a wide range of optical, mechanical, and thermal properties to match those of standard, engineering, and industrial thermoplastics have been produced.
Direct light processing (DLP)
Direct light processing is near-identical to SLA, except DLP uses a digital light projector screen to flash a single image of each layer all at once. Each layer is composed of square pixels, called voxels, due to the projector being a digital screen. In a way, it is almost like an 8-bit ancestor of SLA in the same way that 8-bit drawings have more defined individual square pixels. Since each layer is exposed all at once, DLP can have faster print times compared to SLA, which solidifies a layer in cross sections.
Continuous direct light processing (CDLP)
Continuous direct light processing, also known as continuous liquid interface production (CLIP), produces objects in the same way as DLP. CDLP is called “continuous” since it relies on the continuous motion of the build plate on the Z axis. This results in faster build times because the printer is not required to stop and separate the part from the build plate after each layer is produced.
Powder bed fusion (PBF)
Powder bed fusion technologies produce a solid part using a thermal source that induces fusion, sintering or melting, between the particles of a plastic or metal powder one layer at a time. Most PBF technologies have mechanisms for spreading and smoothing thin layers of powder as a part is constructed, resulting in the final component being encapsulated in powder after the build is complete. The most common applications are functional objects, complex ducting (hollow designs), and low run part production.
The main variations in PBF technologies come from different energy sources, such as lasers or electron beams, and the powders used in the process, such as plastics or metals. Polymer-based PBF technologies allow for innovation in that there is no need for support structures. This makes creating objects with complex geometries easier.
Both metal and plastic PBF objects typically are strong and stiff with mechanical properties that are comparable, or sometimes even better, than the bulk material. There is a large range of post-processing methods available which can give objects a very smooth finish. For this reason, PBF is often used to manufacture functional metal parts for applications in the aerospace, automotive, medical, and dental industries.
The limitations of PBF tend to be surface roughness and shrinkage or distortion during processing, as well as the challenges the arise from powder handling and disposal6.
Selective laser sintering (SLS)
Selective laser sintering is the most
common additive manufacturing technology for industrial applications. The
technology originated in the late 1980s at the University of Texas at Austin7.
SLS 3D printers use a high-powered CO
Let’s break down the SLS process in steps:
- First, a bed is filled with power.
- Second, lasers, sinter, or coalesce, powdered material create a solid structure. This step is repeated, layer by layer, until the object is complete. Finally, the object, still encased in loose powder, is cleaned with brushes and pressurized air.
Differing from SLA and FDM, the nice thing about SLS is it does not require an object to have support structures. This is due to the unfused powder supporting the part during printing. This makes SLS ideal for objects with complex geometries, including interior features, undercuts, and negative features. Parts produced with SLS printing typically have excellent mechanical characteristics, meaning they are very strong. However, objects with thin walls may not be printed due to the minimum 1mm limitation and thin walls in large models may warp after cooling down.
The most common material for selective laser sintering is polyamide (nylon), a popular engineering thermoplastic with great mechanical properties. Nylon is lightweight, strong, and flexible, as well as stable against impact, chemicals, heat, UV light, water, and dirt. Alumide, a blend of gray aluminum powder and polyamide, and rubber-like materials can also be used.
The combination of low cost per part, high productivity, and established materials make SLS a popular choice among engineers for functional prototyping and a cost-effective alternative to injection molding for limited-run or bridge manufacturing.
Selective laser melting (SLM) and direct metal laser sintering (DMLS)
Both selective laser melting and direct metal laser sintering produce objects via a method similar to SLS. Differing from SLS, SLM and DMLS are used in the production of metal parts. SLM fully melts the powder, while DMLS heats the powder to near melting temperatures until it chemically fuses. DMLS only works with alloys while SLM can use single component metals, such as aluminum.
Unlike SLS, SLM and DMLS require support structures to compensate for the high residual stresses generated during the build process. Support structures help to limit the possibility of warping and distortion. DMLS is the most well-established metal additive manufacturing process with the largest installed base.
Electron beam melting (EBM)
Electron beam melting uses a high energy beam rather than a laser to induce fusion between the particles of metal powder. A focused electron beam scans across a thin layer of powder which causes localized melting and solidification over a specific cross-sectional area. The nice thing about electron beam systems is that they produce less residual stresses in objects, meaning there is less need for support structures. EBM also uses less energy and can produce layers quicker than SLM and DMLS. However, the minimum feature size, powder particle size, layer thickness, and surface finish are typically lower quality than SLM and DMLS. EBM requires the objects to be produced in a vacuum and the process can only be used with conductive materials8.
Multi jet fusion (MJF)
Multi jet fusion is essentially a combination of the SLS and material jetting technologies. A carriage with inkjet nozzles, similar to the nozzles used in inkjet printers, passes over the print area, depositing a fusing agent on a thin layer of plastic powder. Simultaneously, a detailing agent that inhibits sintering is printed near the edge of the part. A high-power infrared radiation (IR) energy source then passes over the build bed and sinters the areas where the fusing agent was dispensed, while leaving the rest of the powder untouched. The process repeats until the object is complete9.
Material jetting
Material jetting is most comparable to the inkjet printing process. Like an inkjet printer prints ink layer by layer onto a piece of paper, material jetting deposits material onto the build surface. The layer is then cured or hardened using ultraviolet (UV) light. This is repeated layer by layer until the object is completed. Since the material is deposited in drops, the materials are limited to photopolymers, metals, or wax that cure or harden when exposed to UV light or elevated temperatures.
Material jetting is ideal for realistic prototypes, providing excellent details, high accuracy, and smooth surface finish. Material jetting allows a designer to print in multiple colors and multiple materials in a single print. This makes it great for low run injection molds and medical models. Since material jetting allows multiple materials in a single print, support structures can be printed from a dissolvable material that is easily removed after building. The main drawbacks of material jetting technologies are the high cost and the brittle mechanical properties of the UV activated photopolymers10.
Nanoparticle jetting (NPJ)
Nanoparticle jetting is a process by which a liquid, which contains metal nanoparticles or support nanoparticles, is loaded into the printer via a cartridge. The liquid is then jetted, similar to an inkjet printer, onto a build tray through thousands of nozzles in extremely thin layers of droplets. High temperatures inside the building chamber cause the liquid to evaporate leaving behind metal objects11.
Drop-on-demand (DOD)
Drop-on-demand material jetting printers have two print jets: one to deposit the build materials, typically a wax-like liquid, and another for a dissolvable support material. Similar to material extrusion, DOD printers follow a predetermined path and deposit material in a pointwise fashion to build layers of an object. These machines also employ a fly-cutter, a single-point cutting tool, that skims the build area after each layer to ensure a perfectly flat surface before printing the next layer. DOD technology is typically used to produce wax-like patterns for lost-wax casting, used to duplicate a metal sculpture that is cast from an original sculpture, and mold making applications12.
Binder jetting
A binder jetting process, also referred to as 3DP, uses two materials: a powder and a binder. The binder, which is typically a liquid, acts as the adhesive for the powder. A print head, much like that in an inkjet printer, moves horizontally across the x and y axes to deposit alternating layers of the powder material and the binder. The platform holding the bed of powder, the object is printed on, lowers as each layer is printed. This is repeated until the object is complete. Like SLS, the object does not need support structures since the powder bed acts as support. The powder materials can be either ceramic-based such as glass or gypsum or metal such as stainless steel.
Ceramic-based binder jetting, which uses a ceramic powder as the material, is best for aesthetic applications that need intricate designs such as architectural models, packaging, molds for sand casting, and ergonomic verification. It is not intended for functional prototypes, as the objects created are quite brittle.
Metal binder jetting, which uses a metal powder as the material, is well suited for functional components and more cost-effective than SLM or DMLS metal parts. However, the downside is the metal parts have poorer mechanical properties13.
Direct Energy Deposition (DED)
Direct energy deposition creates objects by melting powder material as it is deposited, similar to material extrusion. It is predominantly used with metal powders or wire and is often referred to as metal deposition since it is exclusive to metals. DED relies on dense support structures which are not ideal for creating a part from scratch, which makes it best suited for repairing or adding material to existing objects, such as turbine blades14.
Laser engineered net shape (LENS)
Laser engineered net shape utilizes a deposition head which consists of a laser head, powder dispensing nozzles, and inert gas tubing. The deposition head melts the powder as it is ejected from the nozzles to build an object layer by layer. The laser creates a melt pool on the build area and powder is sprayed into the pool, where it is melted and then solidified.
Electron beam additive manufacturing (EBAM)
Electron beam additive manufacturing uses an electron beam to create metal objects by welding together metal powder or wire. Differentiating from LENS, which uses a laser, electron beams are more efficient and operate under a vacuum that was originally designed for use in space15.
Sheet lamination
Sheet lamination processes include laminated object manufacturing (LOM) and ultrasonic additive manufacturing (UAM)16. You might be familiar with laminators, I had one growing up. To laminate a piece of paper, you would place the paper in what is known as a laminator pouch. The pouch is made up of two types of plastic: polyethylene terephthalate (PET) on the outer layer and ethylene-vinyl acetate (EVA) on the inner layer. A heated roller then adheres the two sides of the pouch together so the paper is fully encased in plastic when it is done.
The ultrasonic additive manufacturing builds metal objects by fusing and stacking metal strips, sheets, or ribbons. The layers are bound together using ultrasonic welding. The process is done on a machine able to computer numerical control (CNC) mill the workpiece as the layers are built. The process requires removal of the unbound metal, often during the welding process. UAM uses metals such as aluminium, copper, stainless steel, and titanium. The process can bond different materials, build at a fast rate, and make large objects practically while requiring relatively little energy since the metal is not melted.
Trying out products
Now that we know a bit more about FDM and SLA, I can tell you about my experience with products built using these technologies. As a preface, what I was personally looking for was a product, meaning something easy to set up, easy to use, and including a fully integrated experience between the hardware and the software. I didn’t want something I would have to maintain or debug since I would rather this just work. I can understand how other folks might be in the market for something considering their decision matrix, but this was mine.
For trying out FDM, I decided to get the MakerBot Replicator+. I chose this printer mainly because it is a classic. MakerBot has a great community with Thingiverse, their site for sharing and modifying 3D models. Interestingly, the first Makerbot product was open source and they seem to have snubbed the open source community when they went from an open source model to closed with their later products17.
Makerbot has been around since 2009, I figured through 11 years of experience with 3D printing products they should have, hopefully, nailed it. They also have an iPad app that you can use to print any model from Thingiverse. I use Shapr3D for creating models on my iPad so this seemed super convenient. I could create my model in Shapr3D, upload it to Thingiverse, and print it, all from my iPad. The MakerBot also has a camera so you can watch your 3D print happening from the iPad app.
For SLA, I got the Form Labs Form 3. The software you use for printing your models is called PreForm and works on Mac or Windows. While the Form 3 does not have an iPad app, they do have an online dashboard. You can use this for tracking your print progress. Having an online dashboard is at least moving the right direction towards being able to print from my iPad if they should implement printing from the dashboard in the future. Form Labs, like Makerbot, was part of the Netflix documentary, Print the Legend. The Form 3 is their third revision of their product so I figured all the kinks should be, hopefully, worked out by now.
I am going to first go over the setup process with both machines and then we can compare the quality of the prints and the time each machine took to print the same models.
MakerBot Replicator+
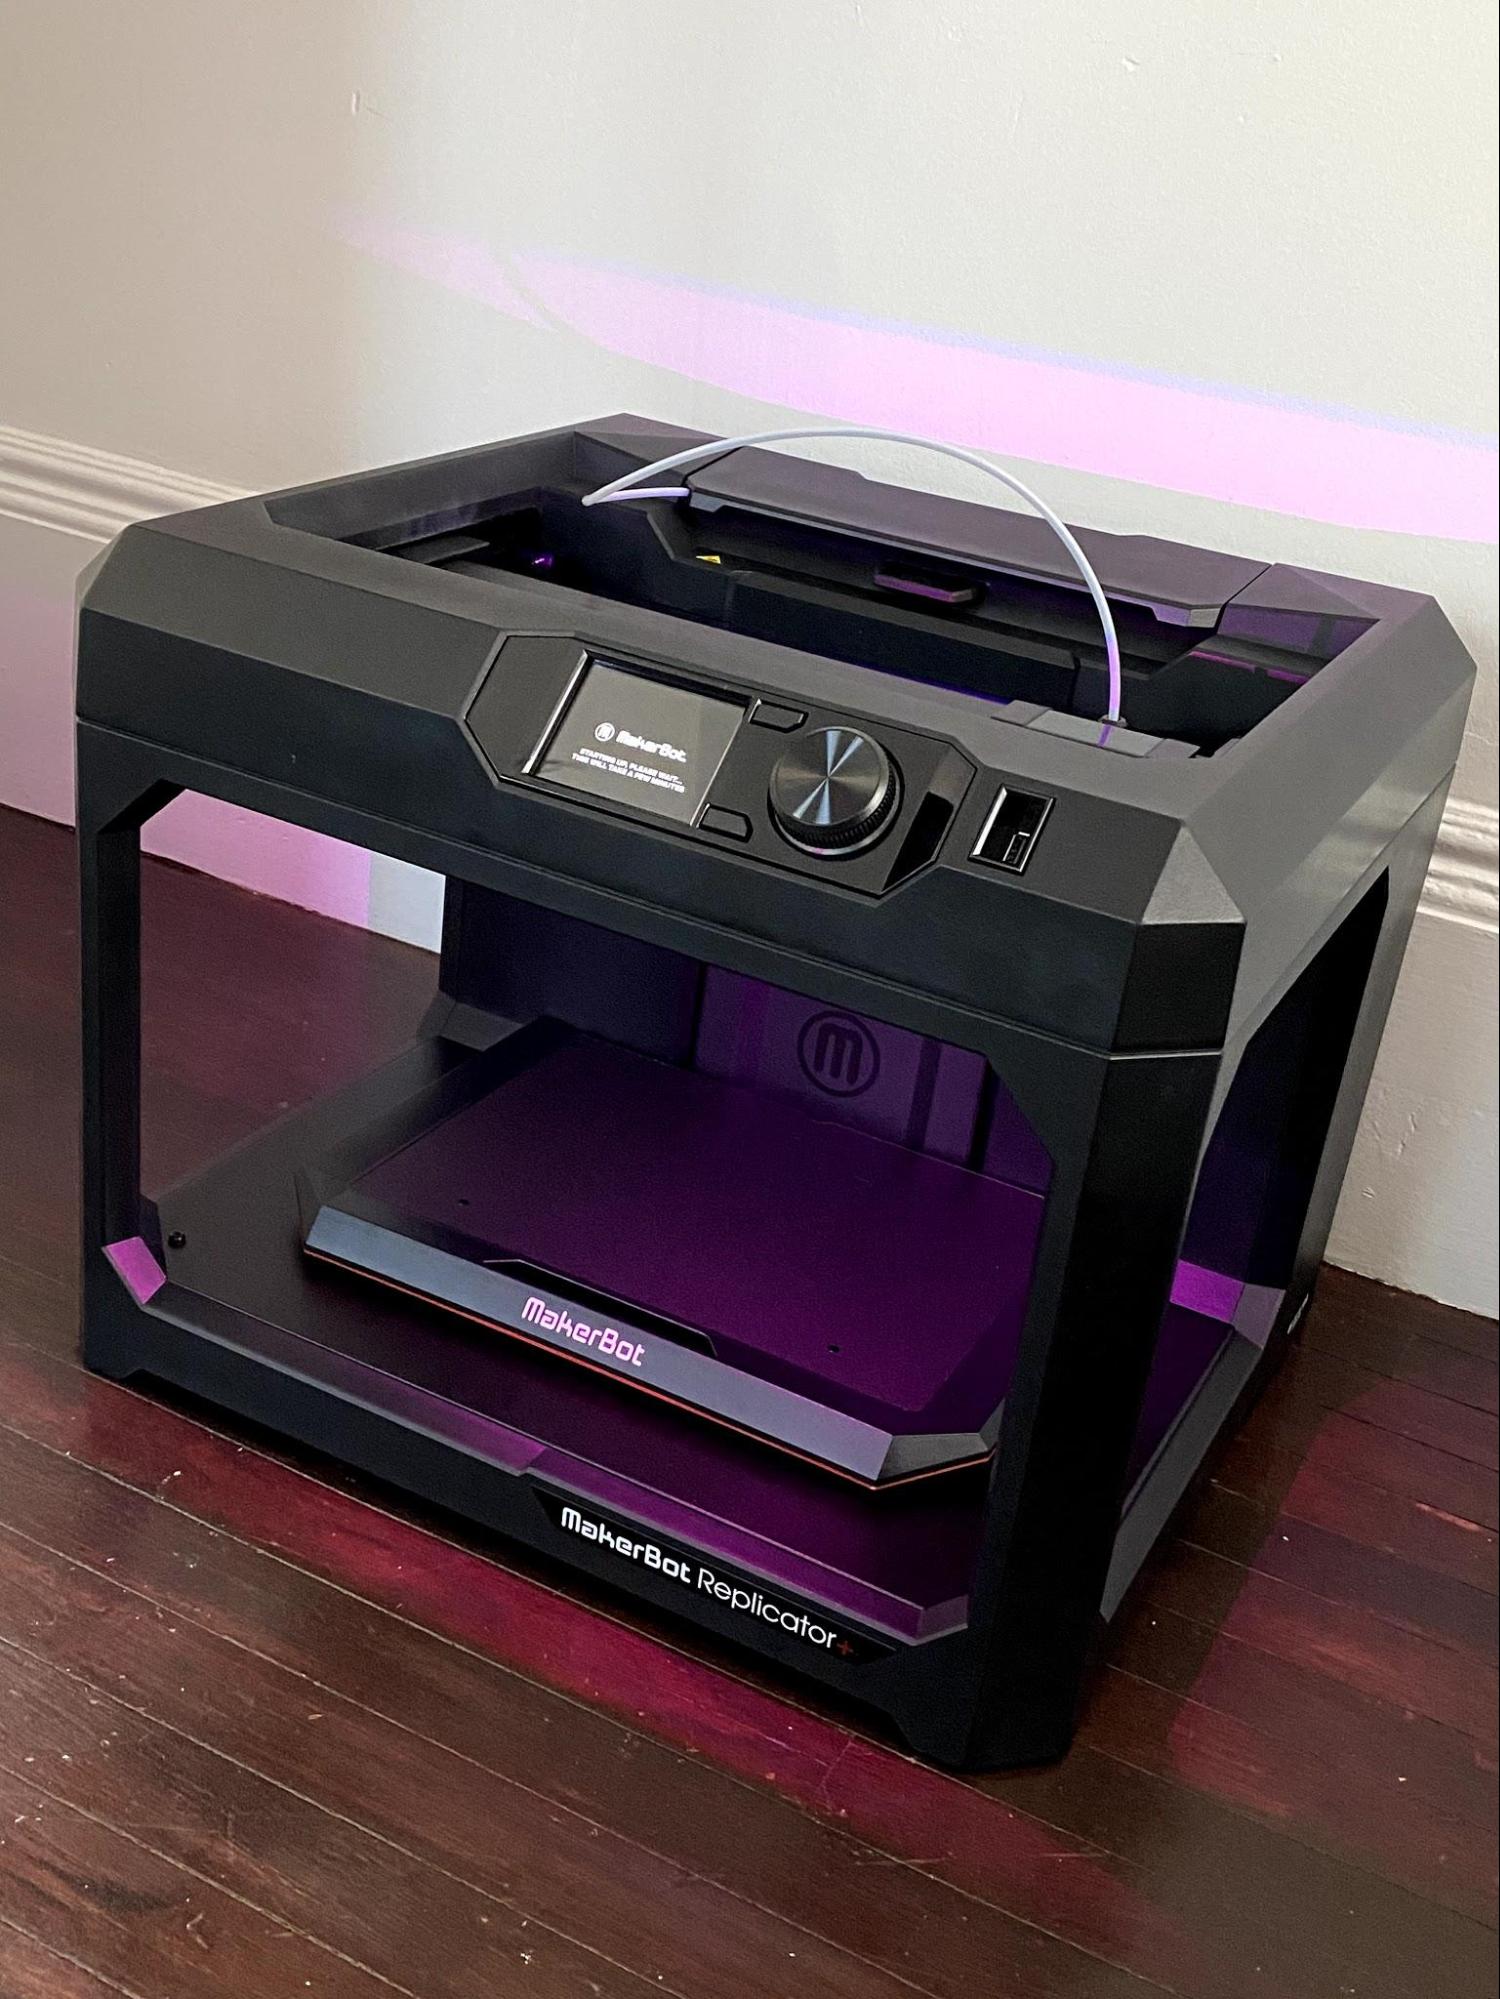
Above is a picture of the printer as I was setting it up. I decided to set up the MakerBot from the iPad app since that would be primarily where I would use it from. If you have ever bought an IoT device you might be familiar with the setup workflow of joining the IoT device’s WiFi network on your mobile device and then configuring the main network to be your WiFi network. This is the same setup process as the MakerBot.
The MakerBot iOS app leaves a bit to be desired. It feels clunky, not snappy, non-native, and slow. Kinda feels like what I would expect an app written by devs with hardware expertise, rather than software expertise, would feel like. Setting up the network failed for me numerous times from my iPad so I decided to try an old Android phone instead. Again, the Android app felt clunky and non-native. It even asked me to go into my Android settings and grant more permissions to the app versus just prompting me for permissions… but finally I got the printer setup through the Android app. Now my printer showed up in my Makerbot account on the Android device and I could get through the setup process.
Being used to the cloud, I expected my printer would just appear on my iPad app since I was logged in to my MakerBot account that I tied the printer to on my Android device. It did not. I had to manually enter the printer’s IP address on my local network to the iOS MakerBot app to add the printer. That seemed like an unnecessary step, my MakerBot account should have stored that information and synced it to my other devices after I completed the setup on my initial device. Or the MakerBot app should be able to scan my local network for printers, but I digress. At least now it was working!
I moved forward with calibrating the device and printing the initial test print. I then continued to print a AAA & AA battery holder, 9V battery holder, and spaceship cookie cutter. I printed these same models on the Form 3 as well, we will go over the comparison later.
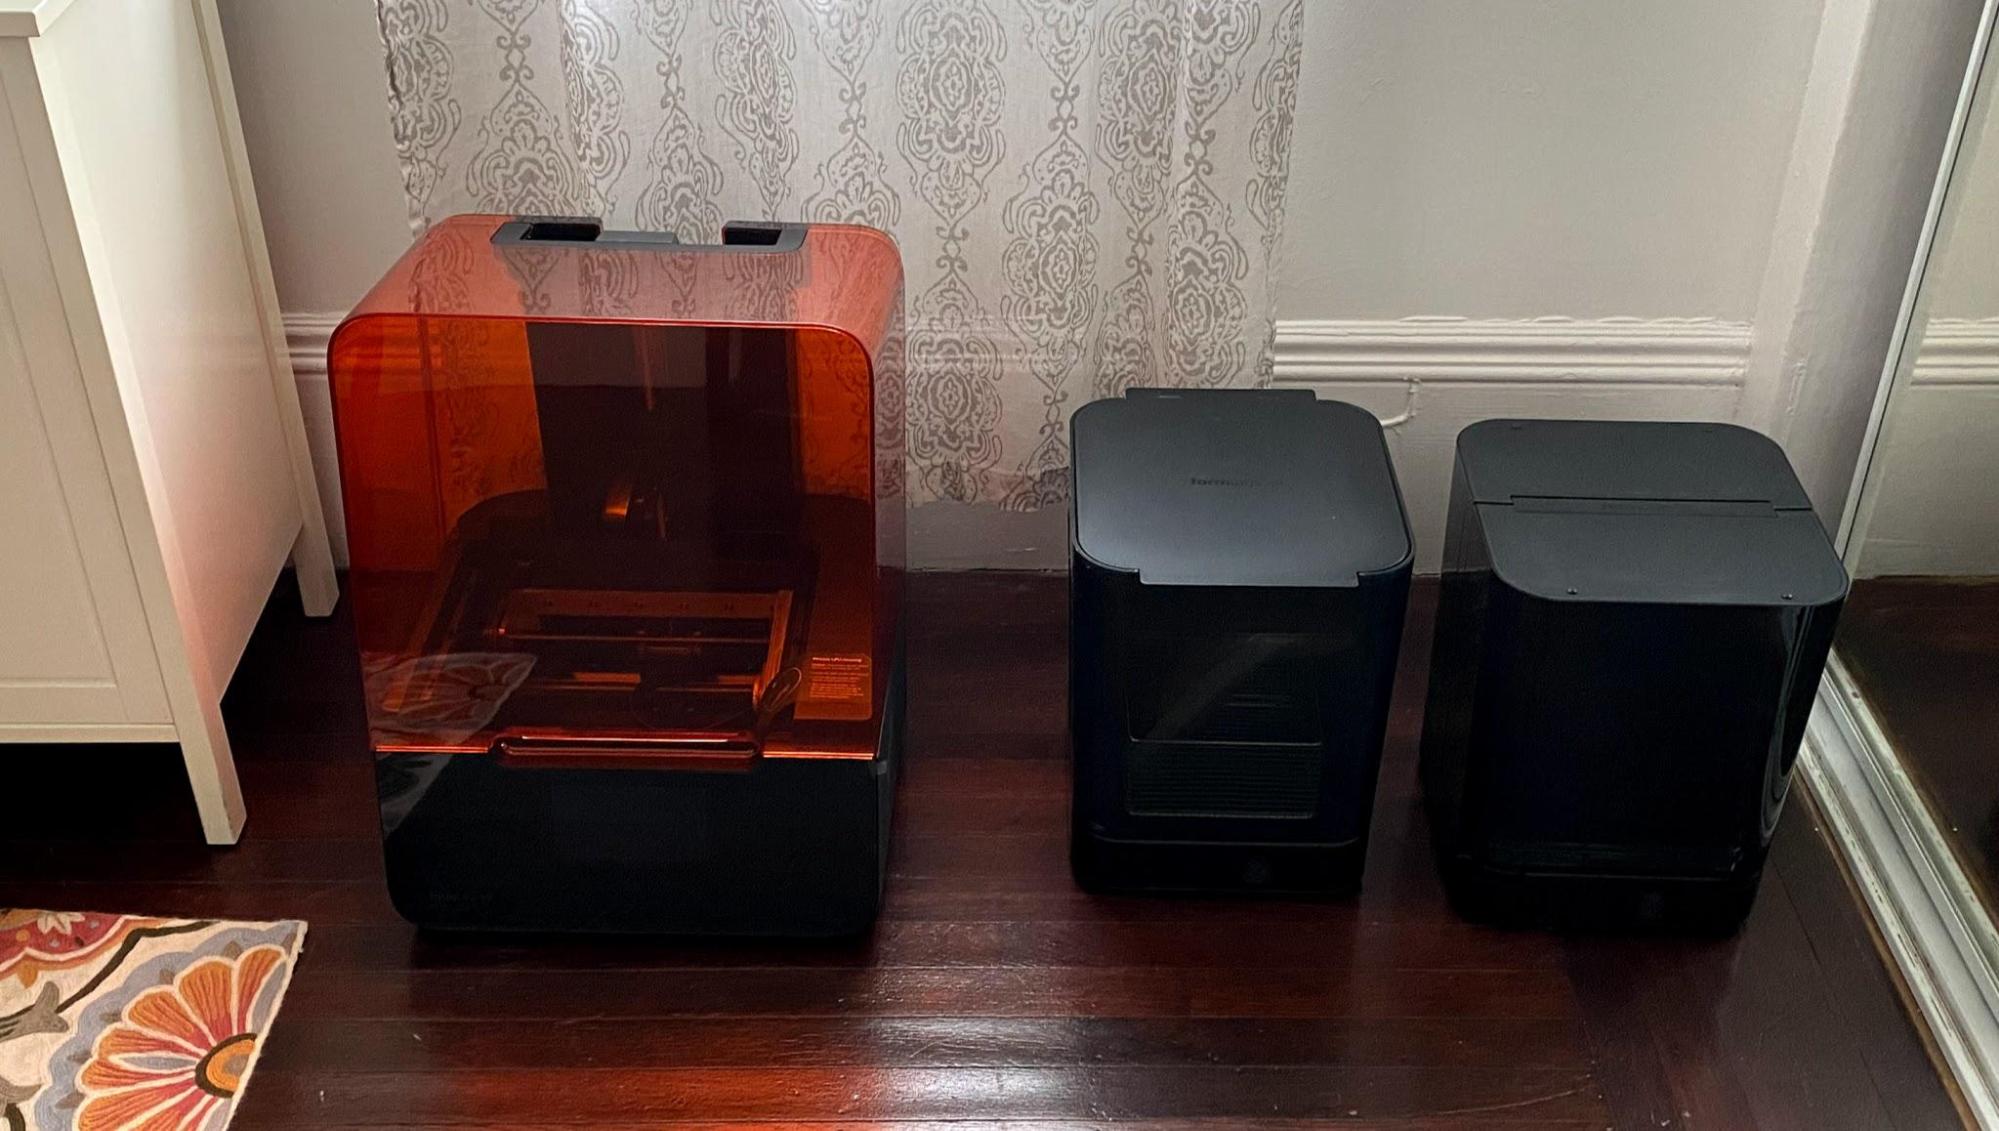
Form 3
When the Form 3 arrived, I was thinking “wow this is complex!” The Replicator+ had come in one box while the Form 3 came in 4 separate boxes. I realized after opening this was because I got the printer, the Form Wash, and the Form Cure as well as a few different resins. Below is a picture after I got everything unboxed.
The Form 3 relies on the built-in touch screen for the setup. This was quite nice after the experience with the Replicator+. I very easily got it connected onto my WiFi network and was ready to print. Since the PreForm software requires Windows I had to pull an old Windows desktop out of my pantry for this. The software is easy to use and soon I was printing my first job. The only trouble I got into was the pre-print steps when my first job was uploaded to be printed. The mixer, part of the tank, was getting a bit off track. After searching the forums, I found this is a common issue18 for a first print and after you add some resin in the tank the mixer will perform better. This turned out to be true so it was only a minor glitch!
I then continued to print the AAA & AA battery holder, 9V battery holder, and spaceship cookie cutter just like I had done with the Replicator+.
Result comparison
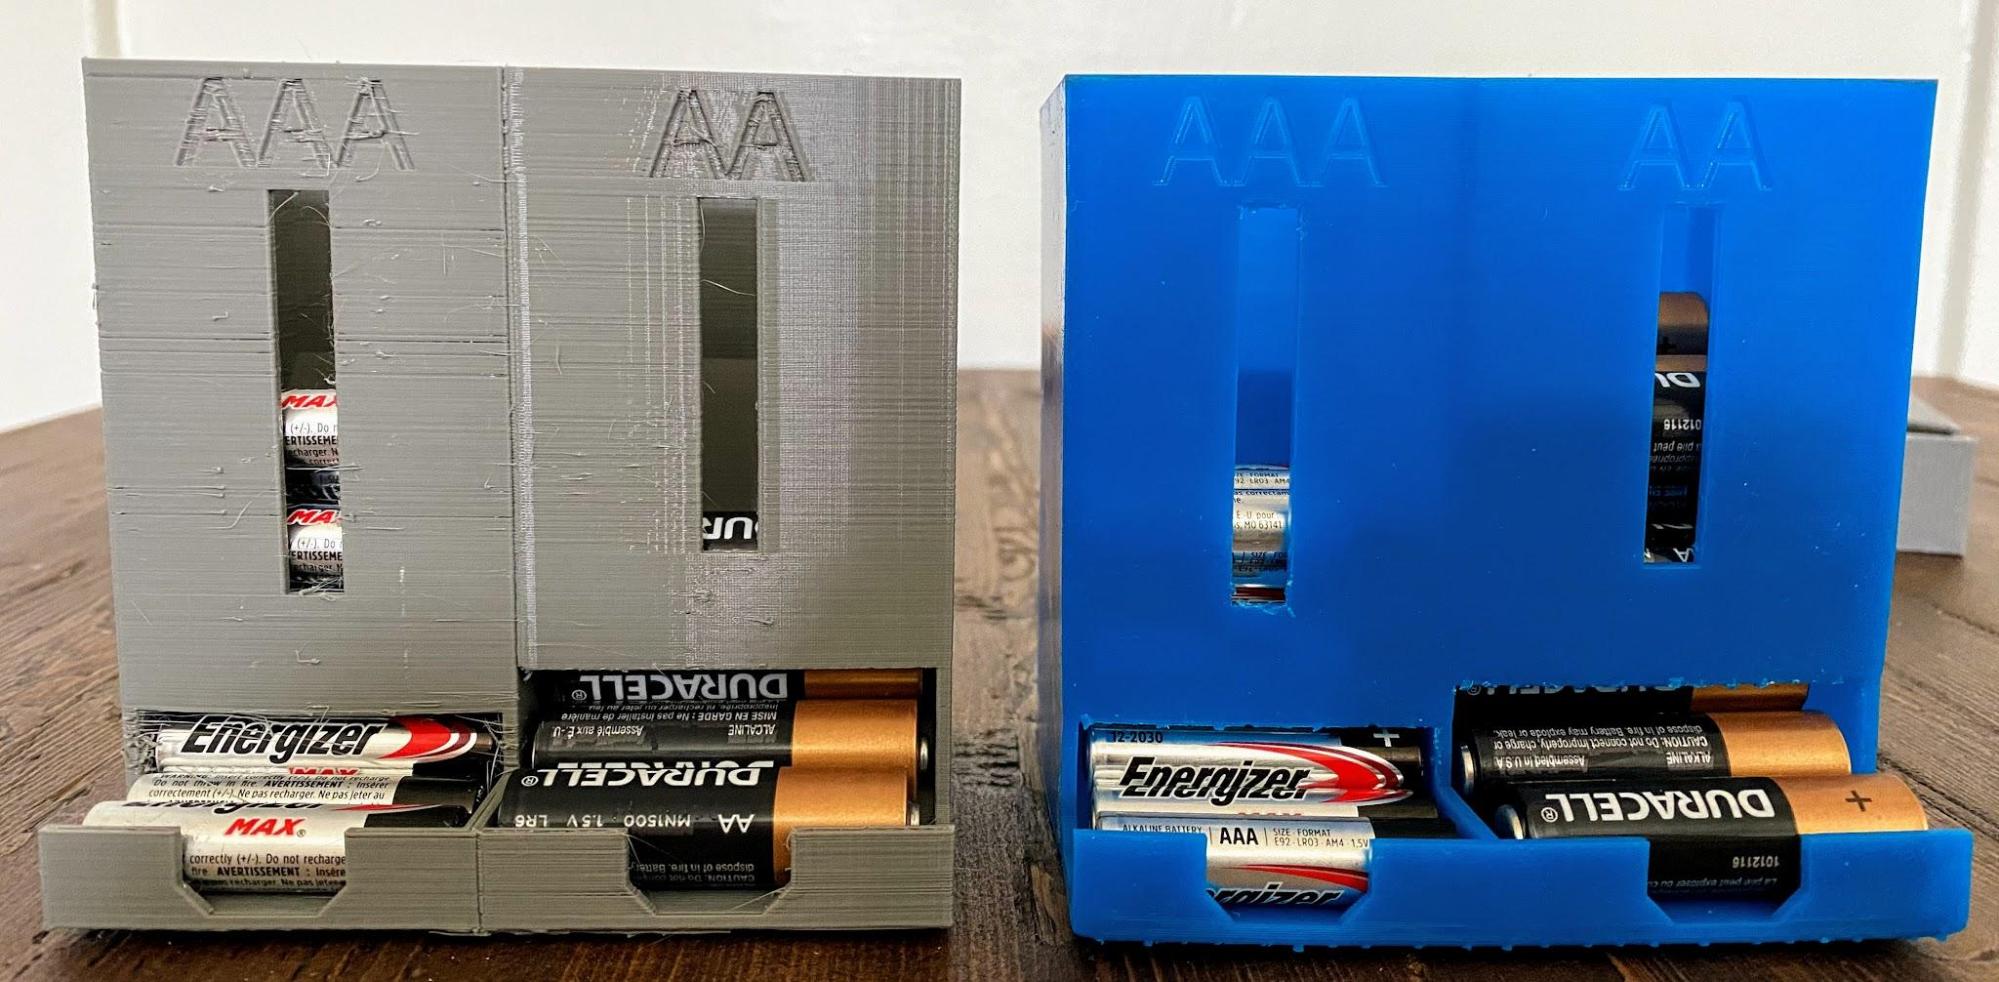
AAA & AA battery holder19
This took 9 hours and 37 minutes on the Replicator+. It took 3 hours and 9 minutes on the Form 3. The model on the left below is from the Replicator+ and the model on the right is from the Form 3. As you can tell the quality from the Form 3 is far smoother. There are fewer build lines, it feels like one continuous piece, and there no strays of filament on the Form 3 model. The only small imperfections in the Form 3 model come from my own work of poorly removing the scaffolding.
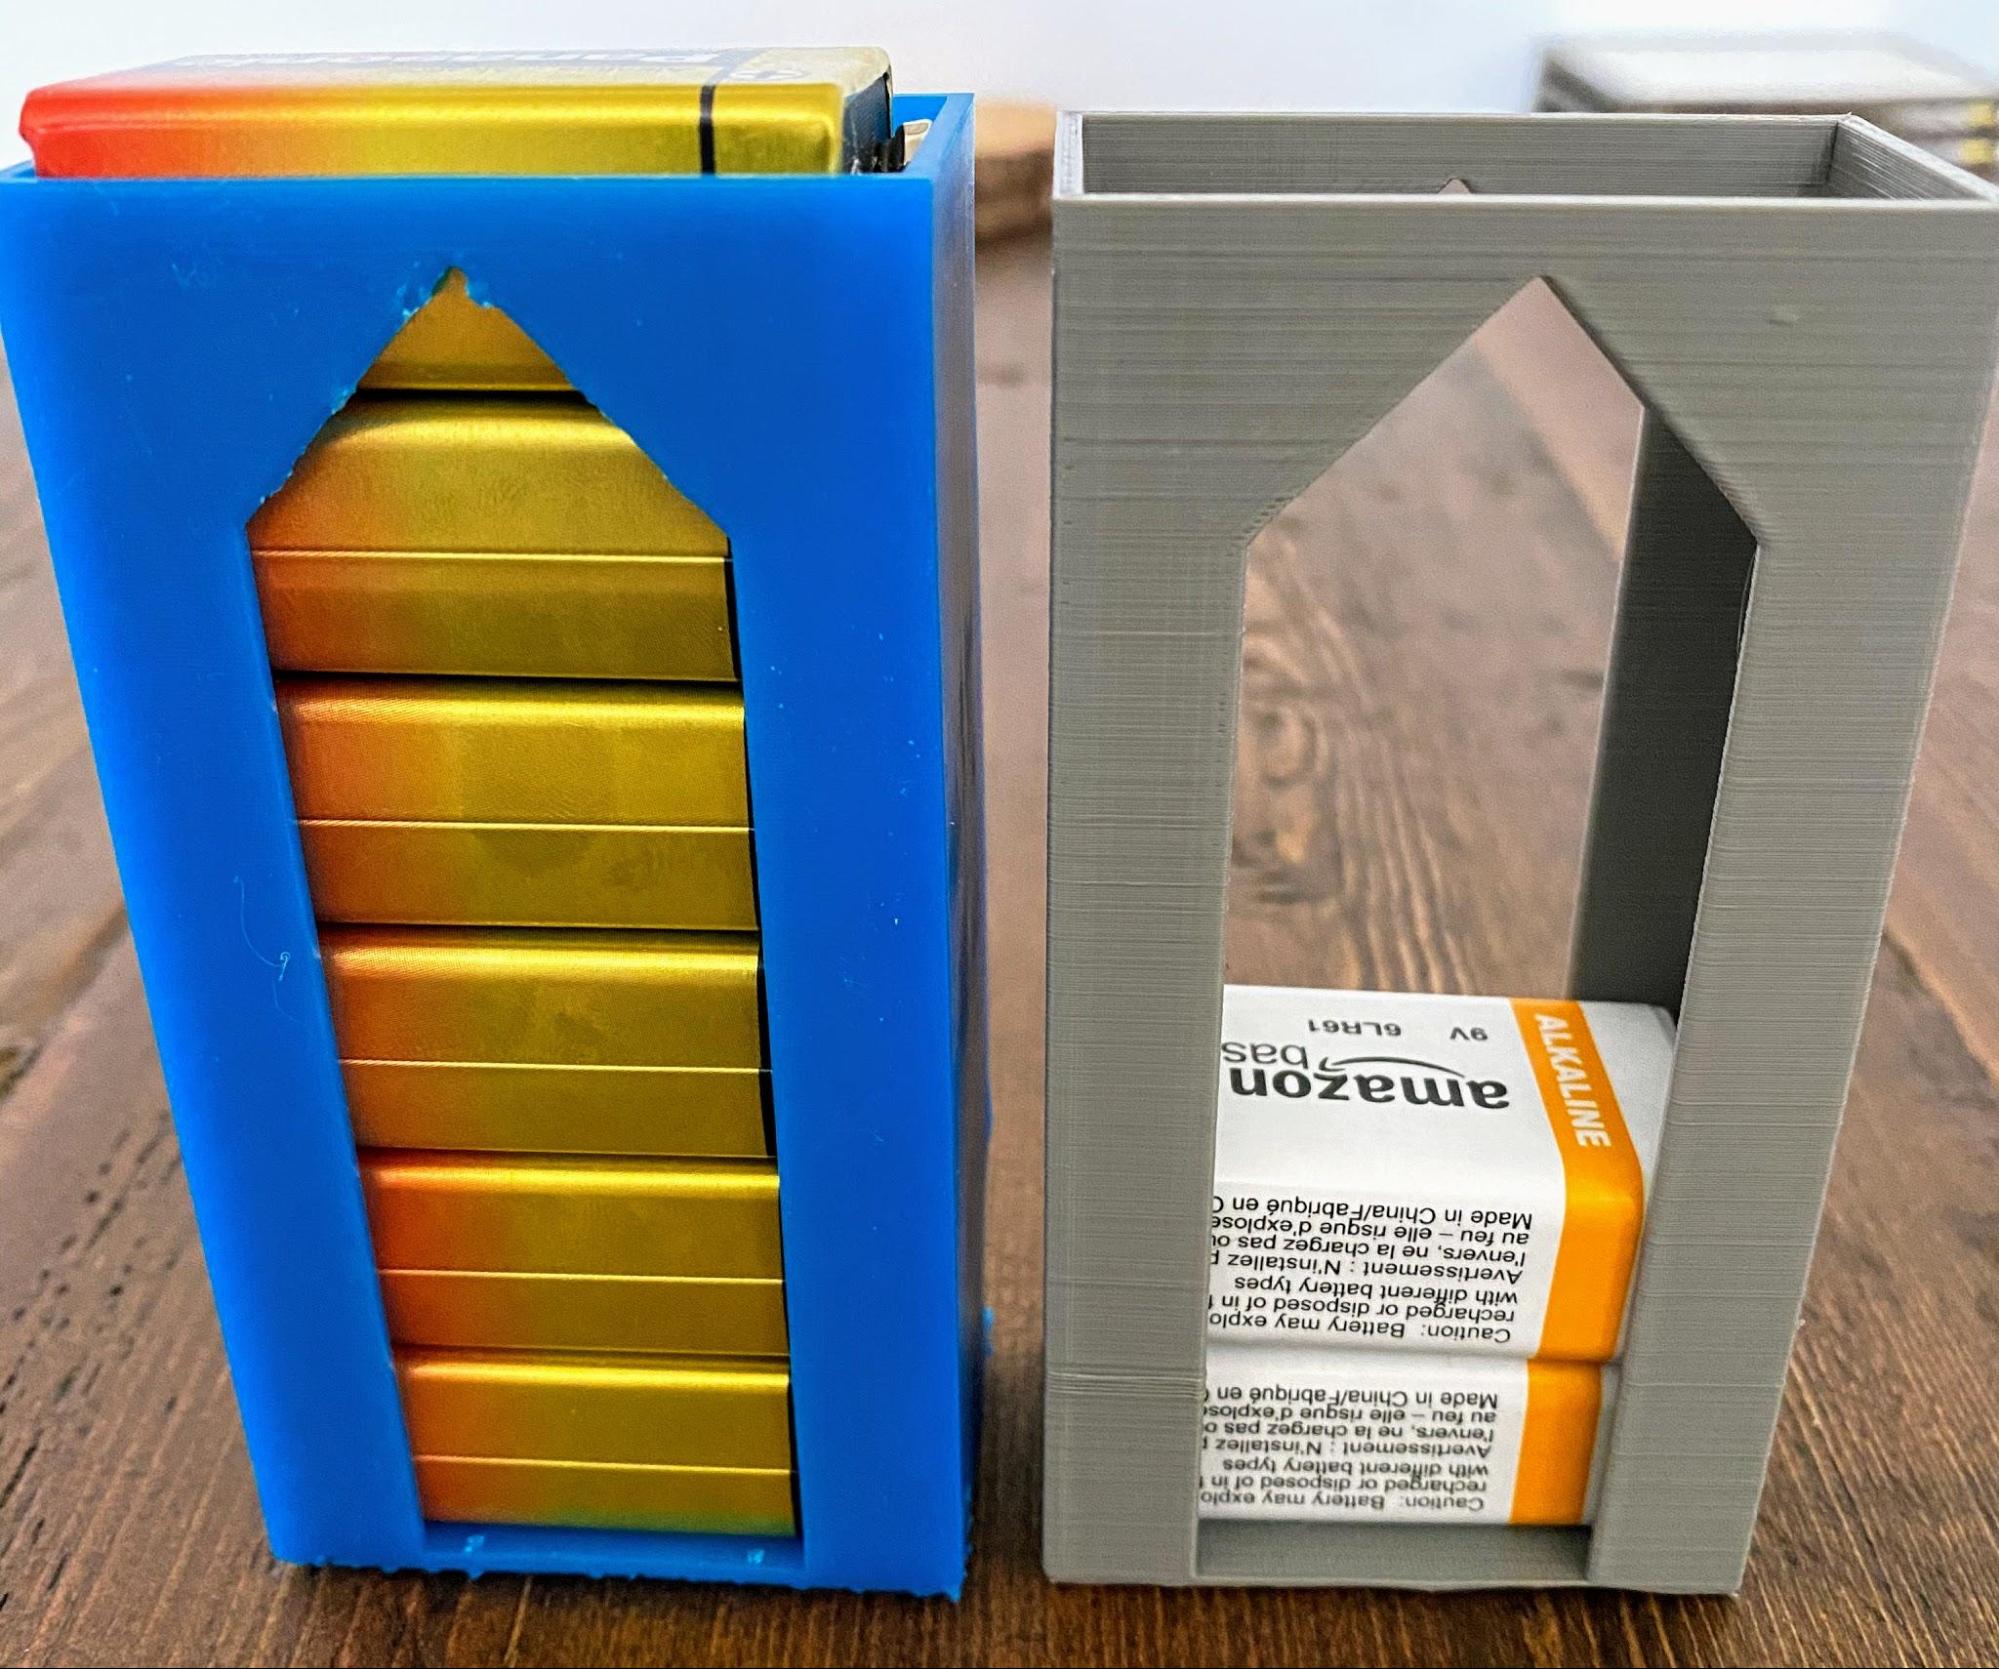
9V battery holder20
This took 2 hours and 15 minutes on the Replicator+. It took 1 hour and 47 minutes on the Form 3. The model on the left below is from the Form 3 and the model on the right is from the Replicator+. Again the Form 3 built the smoother model. However, aside from visible lines, the Replicator+ did a fairly good job at this one. The imperfections on the Form 3 model come from the fact I am terrible at removing the scaffoldings.
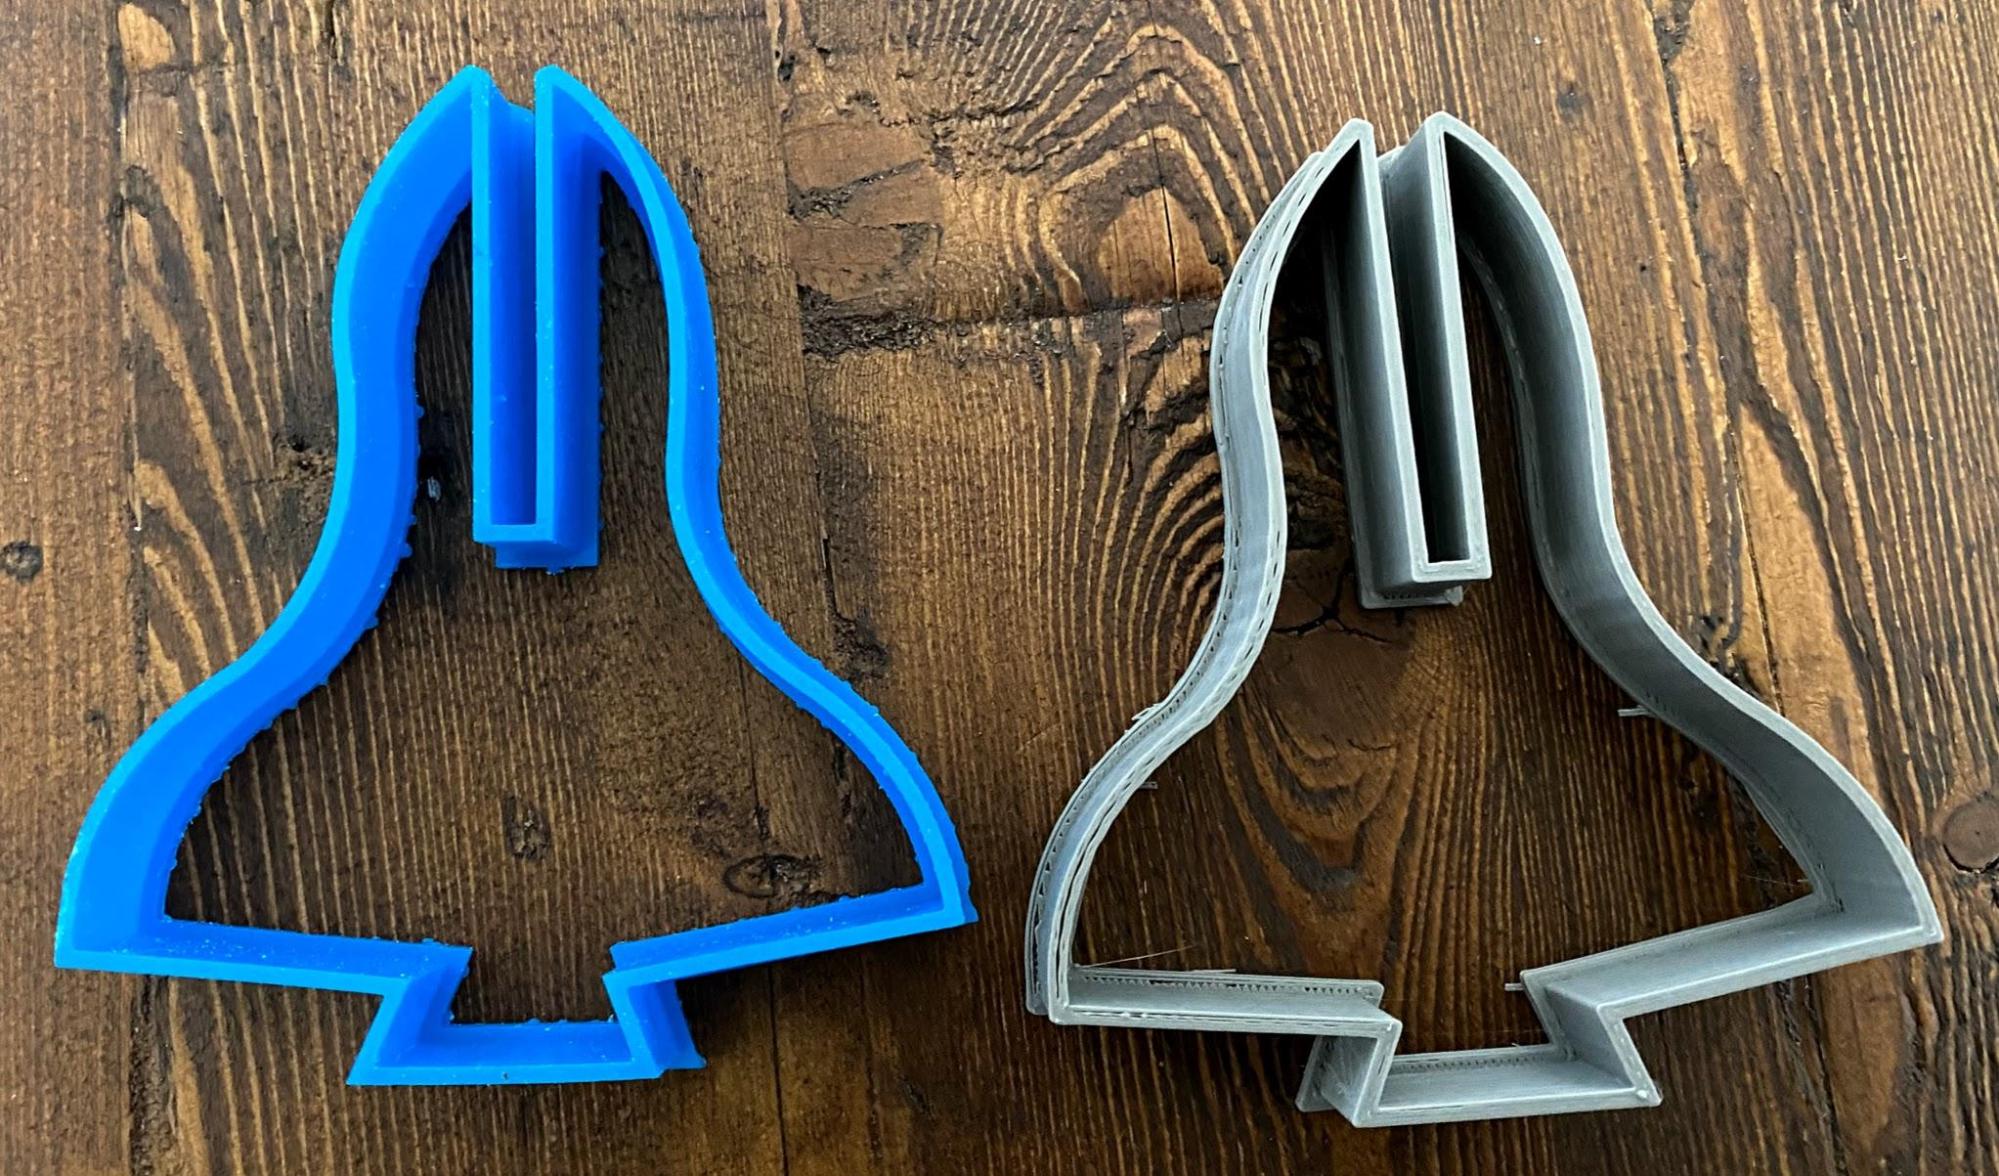
Spaceship cookie cutter21
This took 1 hour and 48 minutes on the Replicator+. It took 51 minutes on the Form 3. The model on the left below is from the Form 3 and the model on the right is from the Replicator+. While the Replicator+ did a good job on this design, the Form 3 is still smoother quality.
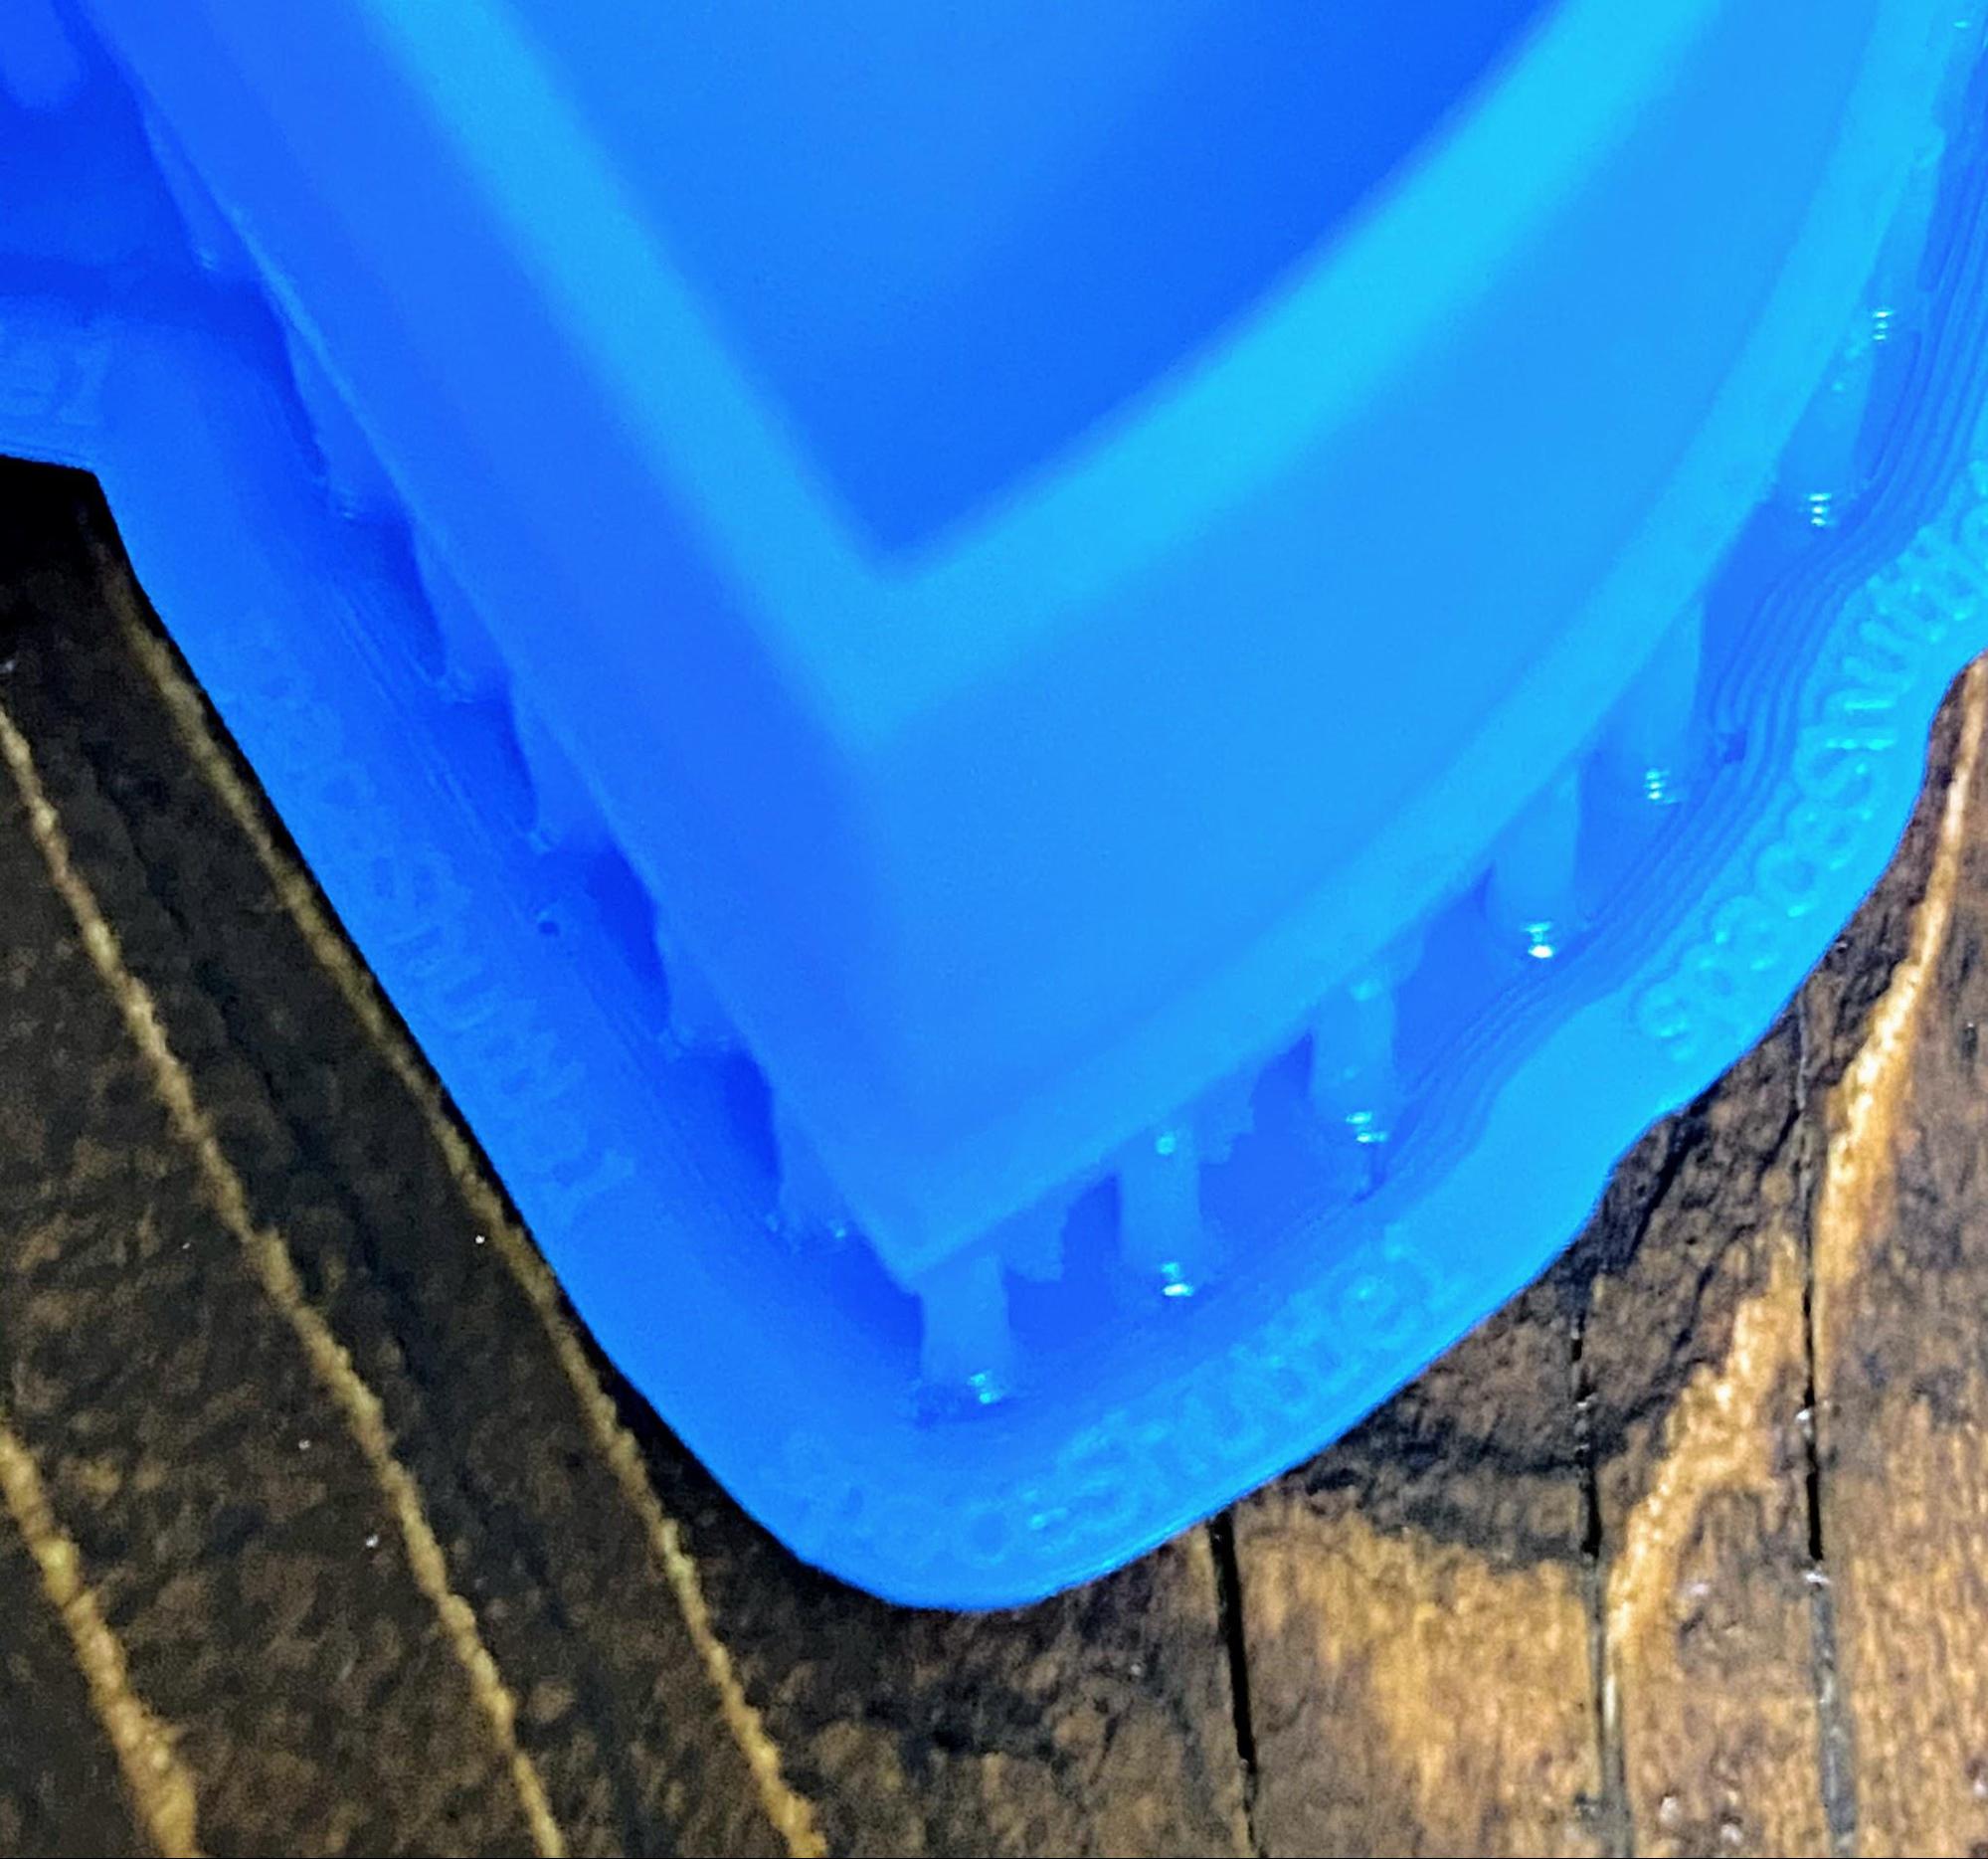
One little detail I really love about the Form 3 is on the base of the prints, that gets removed after printing, is the name of the print, as seen below. I could imagine this coming in handy if you have a bunch of parts being printed that look very similar with small differences.
As shown from the experiments above, the quality and time to build are much better on the Form 3 than the Replicator+. Where the MakerBot wins is in aspects of the user experience. While the iPad app leaves some snappy improvements to be desired, it still exists and works for printing which is on the right track. I also wish the Form 3 had a built-in camera that I could watch as I did with the MakerBot. Since the Form 3 is SLA, I think it would be even more invigorating to watch because I found myself very interested in watching the model rise from the “goo”, aka the resin. Overall, the Form 3 is great and I can only anticipate they continue to improve!
I hope you enjoyed and learned something from this article even if you aren’t in the market for a 3D printer. In the future, I would love if products did automatic support removal because in the pictures above from the Form 3 any imperfections actually came from my removal of the support structures22. I would also love to see some sort of reliable quality monitoring23. While a lot of progress has been made in the 3D printing space, I cannot wait to see what will come in the future. The ability to go from a digital file to a physical object rapidly with many different materials can enable so many folks to create something they could only imagine in their wildest dreams until now.
- Obviously having two 3D printers is a bit unseemly so I decided after I tried them both I would donate one to a nearby school. [return]
- https://www.astm.org/Standards/ISOASTM52900.htm [return]
- https://www.lboro.ac.uk/research/amrg/about/the7categoriesofadditivemanufacturing/materialextrusion/ [return]
- https://www.lboro.ac.uk/research/amrg/about/the7categoriesofadditivemanufacturing/vatphotopolymerisation/ [return]
- http://www.historyofinformation.com/detail.php?id=3864 [return]
- https://www.lboro.ac.uk/research/amrg/about/the7categoriesofadditivemanufacturing/powderbedfusion/ [return]
- https://www.me.utexas.edu/news/news/selective-laser-sintering-birth-of-an-industry [return]
- https://www.sciencedirect.com/topics/chemistry/electron-beam-melting [return]
- https://www.protolabs.com/services/3d-printing/multi-jet-fusion/ [return]
- https://www.lboro.ac.uk/research/amrg/about/the7categoriesofadditivemanufacturing/materialjetting/ [return]
- https://www.additivemanufacturing.media/blog/post/am-101-nanoparticle-jetting-npj [return]
- https://www.sciencedirect.com/science/article/abs/pii/S0924424719312701 [return]
- https://www.lboro.ac.uk/research/amrg/about/the7categoriesofadditivemanufacturing/binderjetting/ [return]
- https://www.lboro.ac.uk/research/amrg/about/the7categoriesofadditivemanufacturing/directedenergydeposition/ [return]
- https://www.researchgate.net/publication/328169730_A_new_3D_printing_method_based_on_non-vacuum_electron_beam_technology [return]
- https://www.lboro.ac.uk/research/amrg/about/the7categoriesofadditivemanufacturing/sheetlamination/ [return]
- https://3dprintingindustry.com/news/failure-makerbot-expert-weighs-78926/ [return]
- https://forum.formlabs.com/t/form-3-mixer-arm-problem/25331 [return]
- https://www.thingiverse.com/thing:3358129 [return]
- https://www.thingiverse.com/thing:832281 [return]
- https://www.thingiverse.com/thing:513900 [return]
- https://www.arxiv-vanity.com/papers/1904.12117/ [return]
- https://arxiv.org/pdf/2003.08749.pdf [return]